m (→Art Book Material: minor fixes, replaced: Danganronpa 1.2 Reload Chō Kōkō-kyū no Kōshiki Settei Shiryōshū -Sai Sōten- → Danganronpa 1.2 Official Setting Materials Collection) |
No edit summary |
||
| (9 intermediate revisions by 4 users not shown) | |||
| Line 5: | Line 5: | ||
Designs= |
Designs= |
||
=Design Documents= |
=Design Documents= |
||
| + | |||
| − | ==Novel Profiles== |
||
| + | ==Splash Images== |
||
<gallery widths="150" spacing="small" captionalign="center" hideaddbutton="true"> |
<gallery widths="150" spacing="small" captionalign="center" hideaddbutton="true"> |
||
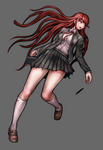
| + | Danganronpa Zero - Ryoko Otonashi Splash Illustration.png|Ryoko Otonashi |
||
| − | DR0_Design_1.png|[[Ryōko Otonashi]]<ref name="DRZ Profiles">''[[Danganronpa Zero]]'' volume insert illustrations</ref> |
||
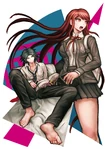
| + | Danganronpa Zero - Yasuke Matsuda Splash Illustration.png|Yasuke Matsuda |
||
| − | DR0_Design_2.png|[[Yasuke Matsuda]]<ref name="DRZ Profiles"></ref> |
||
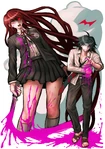
| + | Danganronpa Zero - Mukuro Ikusaba Splash Illustration.png|Mukuro Ikusaba |
||
| − | DR0_Design_3.png|[[Yūto Kamishiro]]<ref name="DRZ Profiles"></ref> |
||
| − | DR0_Design_5.png|[[Mukuro Ikusaba]]<ref name="DRZ Profiles"></ref> |
||
| − | DR0_Design_6.png|[[Isshiki Madarai]]<ref name="DRZ Profiles"></ref> |
||
| − | DR0_Design_7.png|[[Jin Kirigiri]]<ref name="DRZ Profiles"></ref> |
||
| − | DR0_Design_8.png|[[The Steering Committee]]<ref name="DRZ Profiles"></ref> |
||
</gallery> |
</gallery> |
||
| − | ==Design |
+ | ==Design Sketches and Artwork== |
<gallery widths="150" spacing="small" captionalign="center" hideaddbutton="true"> |
<gallery widths="150" spacing="small" captionalign="center" hideaddbutton="true"> |
||
| − | + | Danganronpa Zero - Design Profile - Ryoko Otonashi.png|''Danganronpa Zero''<br>[[Ryōko Otonashi]]<br>design profile<ref name="DRZ Profiles">''[[Danganronpa Zero]]'' volume insert illustrations</ref> |
|
| + | |||
| ⚫ | |||
| − | + | Danganronpa Zero - Design Profile - Yasuke Matsuda.png|''Danganronpa Zero''<br>[[Yasuke Matsuda]]<br>design profile<ref name="DRZ Profiles"></ref> |
|
| − | + | Danganronpa Zero - Design Profile - Yuto Kamishiro.png|''Danganronpa Zero''<br>[[Yūto Kamishiro]]<br>design profile<ref name="DRZ Profiles"></ref> |
|
| + | Danganronpa Zero - Design Profile - Mukuro Ikusaba.png|''Danganronpa Zero''<br>[[Mukuro Ikusaba]]<br>design profile<ref name="DRZ Profiles"></ref> |
||
| + | Danganronpa Zero - Design Profile - Isshiki Madarai.png|''Danganronpa Zero''<br>[[Isshiki Madarai]]<br>design profile<ref name="DRZ Profiles"></ref> |
||
| + | Danganronpa Zero - Design Profile - Jin Kirigiri.png|''Danganronpa Zero''<br>[[Jin Kirigiri]]<br>design profile<ref name="DRZ Profiles"></ref> |
||
| ⚫ | |||
| + | </gallery> |
||
| + | |||
| + | ==Early Designs and Concept Art== |
||
| + | <gallery widths="150" spacing="small" captionalign="center" hideaddbutton="true"> |
||
| + | Danganronpa 3 Booklet - Design Sketches - Steering Committee Member (1).png|''Danganronpa 3''<br>Steering Committee Member<br>early design sketches<ref name="DR3 Booklet">''Danganronpa 3'' limited edition release booklet</ref> |
||
| + | Danganronpa 3 Booklet - Design Sketches - Steering Committee Member (2).png|''Danganronpa 3''<br>Steering Committee Member<br>early design sketches<ref name="DR3 Booklet"></ref> |
||
| + | Danganronpa 3 Booklet - Design Sketches - Steering Committee Member (3).png|''Danganronpa 3''<br>Steering Committee Member<br>early design sketches<ref name="DR3 Booklet"></ref> |
||
| + | Danganronpa 3 Booklet - Design Sketches - Steering Committee Member (4).png|''Danganronpa 3''<br>Steering Committee Member<br>early design sketches<ref name="DR3 Booklet"></ref> |
||
| + | </gallery> |
||
|-| |
|-| |
||
| Line 27: | Line 37: | ||
=Novel Covers= |
=Novel Covers= |
||
<gallery widths="150" spacing="small" captionalign="center" hideaddbutton="true"> |
<gallery widths="150" spacing="small" captionalign="center" hideaddbutton="true"> |
||
| − | + | Danganronpa Zero - Volume 1 Cover.png|Front cover of<br>Volume 1 |
|
| − | + | Danganronpa Zero - Volume 2 Cover.png|Front cover of<br>Volume 2 |
|
| − | + | Danganronpa Zero - Full Cover.png|Full illustration of the front covers |
|
| + | </gallery> |
||
| + | |||
| + | <gallery widths="150" spacing="small" captionalign="center" hideaddbutton="true"> |
||
| + | Danganronpa Zero - Volume 1 Cover Clean Illustration.png|Clean Illustration<br>Volume 1 |
||
| + | Danganronpa Zero - Volume 2 Cover Clean Illustration.png|Clean Illustration<br>Volume 2 |
||
</gallery> |
</gallery> |
||
| Line 36: | Line 51: | ||
=Insert Illustrations= |
=Insert Illustrations= |
||
<gallery widths="150" spacing="small" captionalign="center" hideaddbutton="true"> |
<gallery widths="150" spacing="small" captionalign="center" hideaddbutton="true"> |
||
| − | + | Danganronpa Zero - Volume 1 Illustration (1).png|[[Junko Enoshima]] stomping a corpse. |
|
| − | + | Danganronpa Zero - Volume 1 Illustration (2).png|A startled [[Ryōko Otonashi]] finds [[Yasuke Matsuda]] sitting on a bed in the lab room. |
|
| − | + | Danganronpa Zero - Volume 1 Illustration (3).png|Ryōko running away from [[Isshiki Madarai]]. |
|
| − | + | Danganronpa Zero - Volume 1 Illustration (4).png|[[Yūto Kamishiro]] appears. |
|
| − | + | Danganronpa Zero - Volume 1 Illustration (5).png|[[Jin Kirigiri]] and [[Kyoko Kirigiri]]'s discussion. |
|
| − | + | Danganronpa Zero - Volume 2 Illustration (1).png|[[Makoto Naegi]] held captive by Misshiki Madarai. |
|
| − | + | Danganronpa Zero - Volume 2 Illustration (2).png|Ryōko meets [[Monokuma]] Maid. |
|
| − | + | Danganronpa Zero - Volume 2 Illustration (3).png|[[Mukuro Ikusaba]] fighting the Madarai Brothers. |
|
| − | + | Danganronpa Zero - Volume 2 Illustration (4).png|Ryōko ([[Junko Enoshima]]) killing Yasuke in a fit of despair. |
|
| − | + | Danganronpa Zero - Volume 2 Illustration (5).png|Ryōko and Junko being the same person. |
|
</gallery> |
</gallery> |
||
| Line 52: | Line 67: | ||
=''[[Danganronpa 3: The End of Hope's Peak High School]]'' - ''[[Danganronpa 3: The End of Hope's Peak High School/Despair Arc|Despair Arc]]''= |
=''[[Danganronpa 3: The End of Hope's Peak High School]]'' - ''[[Danganronpa 3: The End of Hope's Peak High School/Despair Arc|Despair Arc]]''= |
||
<gallery widths="150" spacing="small" captionalign="center" hideaddbutton="true"> |
<gallery widths="150" spacing="small" captionalign="center" hideaddbutton="true"> |
||
| − | + | DR0 Cameos DR3 5-1 Blu-Ray.png|[[Yūto Kamishiro]]'s cameo, passing [[Ryota Mitarai]]'s dorm in [[Danganronpa 3 - Despair Arc - Episode 05|Episode 05]] |
|
| − | + | DR0 Cameos DR3 5-2 Blu-Ray.png|[[The Steering Committee]] overlooking the [[Izuru Kamukura Project]] in [[Danganronpa 3 - Despair Arc - Episode 05|Episode 05]] |
|
| − | + | DR0 Cameos DR3 8 Blu-Ray.png|[[Yasuke Matsuda]] overlooking [[the Parade]] in [[Danganronpa 3 - Despair Arc - Episode 08|Episode 08]] |
|
</gallery> |
</gallery> |
||
| Line 75: | Line 90: | ||
==Art Book Material== |
==Art Book Material== |
||
<gallery widths="150" spacing="small" captionalign="center" hideaddbutton="true"> |
<gallery widths="150" spacing="small" captionalign="center" hideaddbutton="true"> |
||
| + | Danganronpa Zero Ebten Poster 1.png|''Danganronpa Zero'' Ebten poster |
||
| − | Danganronpa 1.2 Reload Artbook Group Shot 01.png|''Danganronpa 1.2 Reload'' group image<ref name="DR 1.2 Art Book"> ''[[Danganronpa 1.2 Official Setting Materials Collection]]'' (''Danganronpa 1.2 Reload'' art book)</ref> |
||
| + | Danganronpa Zero Ebten Poster 2.png|''Danganronpa Zero'' Ebten poster |
||
| − | |||
| − | Art Book Scan Danganronpa 1.2 Zero Page 1.png|''Danganronpa Zero'' Page<ref name="DR 1.2 Art Book"></ref><ref name="Zero Scans 1.2 Artbook"> '''Scan Credit:'''[http://manlyronpa.tumblr.com/post/161603317952/danganronpa-zero-pages-from-the-12-artbook-as ''@manlyronpa'' on Tumblr]</ref> |
||
| − | |||
| − | Art Book Scan Danganronpa 1.2 Zero Page 2.png|''Danganronpa Zero'' Page<ref name="DR 1.2 Art Book"></ref><ref name="Zero Scans 1.2 Artbook"> '''Scan Credit:'''[http://manlyronpa.tumblr.com/post/161603317952/danganronpa-zero-pages-from-the-12-artbook-as ''@manlyronpa'' on Tumblr]</ref> |
||
</gallery> |
</gallery> |
||
==Other Scans== |
==Other Scans== |
||
<gallery widths="150" spacing="small" captionalign="center" hideaddbutton="true"> |
<gallery widths="150" spacing="small" captionalign="center" hideaddbutton="true"> |
||
| − | + | Danganronpa Zero - Volume 2 Teaser.png|Teaser image for Volume 2 |
|
Yasuke and Ryōko sketch by Danganronpa Gaiden Killer Killer manga artist Mitomo Sasako.jpg|Pencil illustration fanart by ''[[Danganronpa Gaiden: Killer Killer]]'' artist [[Mitomo Sasako]]<ref name="Mitomo Ryoko and Yasuke Illustration">'''Twitter:''' [https://twitter.com/0819_to_mo/status/740063788368461825 ''@0819_to_mo'' Mitomo Sasko's "ゼロの資料発掘" Tweet] (June 6th, 2016)</ref> |
Yasuke and Ryōko sketch by Danganronpa Gaiden Killer Killer manga artist Mitomo Sasako.jpg|Pencil illustration fanart by ''[[Danganronpa Gaiden: Killer Killer]]'' artist [[Mitomo Sasako]]<ref name="Mitomo Ryoko and Yasuke Illustration">'''Twitter:''' [https://twitter.com/0819_to_mo/status/740063788368461825 ''@0819_to_mo'' Mitomo Sasko's "ゼロの資料発掘" Tweet] (June 6th, 2016)</ref> |
||
</gallery> |
</gallery> |
||
Revision as of 23:15, 16 June 2020
Gallery
| This page is an image gallery. It contains various images based on the topic of the main article. As such, please proceed with caution as some images may contain spoilers. |
Design Documents
Splash Images
Design Sketches and Artwork
Early Designs and Concept Art
Novel Covers
Insert Illustrations
Junko Enoshima stomping a corpse.
A startled Ryōko Otonashi finds Yasuke Matsuda sitting on a bed in the lab room.
Ryōko running away from Isshiki Madarai.
Yūto Kamishiro appears.
Jin Kirigiri and Kyoko Kirigiri's discussion.
Makoto Naegi held captive by Misshiki Madarai.
Ryōko meets Monokuma Maid.
Mukuro Ikusaba fighting the Madarai Brothers.
Ryōko (Junko Enoshima) killing Yasuke in a fit of despair.
Danganronpa 3: The End of Hope's Peak High School - Despair Arc
Super Danganronpa 2.5: Komaeda Nagito to Sekai no Hakaimono
Yasuke Matsuda, Ryōko Otonashi and Isshiki Madarai in Super Danganronpa 2.5.
Magazines & Other Scans
Art Book Material
Other Scans
Teaser image for Volume 2


![Danganronpa Zero - Design Profile - Ryoko Otonashi.png (555 KB) Danganronpa Zero Ryōko Otonashi design profile[1]](https://static.wikia.nocookie.net/danganronpa/images/e/e8/Danganronpa_Zero_-_Design_Profile_-_Ryoko_Otonashi.png/revision/latest/scale-to-width-down/150?cb=20200616224841)
![Danganronpa Zero - Design Profile - Yasuke Matsuda.png (484 KB) Danganronpa Zero Yasuke Matsuda design profile[1]](https://static.wikia.nocookie.net/danganronpa/images/1/1f/Danganronpa_Zero_-_Design_Profile_-_Yasuke_Matsuda.png/revision/latest/scale-to-width-down/150?cb=20200616224845)
![Danganronpa Zero - Design Profile - Yuto Kamishiro.png (419 KB) Danganronpa Zero Yūto Kamishiro design profile[1]](https://static.wikia.nocookie.net/danganronpa/images/6/6c/Danganronpa_Zero_-_Design_Profile_-_Yuto_Kamishiro.png/revision/latest/scale-to-width-down/150?cb=20200616224848)
![Danganronpa Zero - Design Profile - Mukuro Ikusaba.png (448 KB) Danganronpa Zero Mukuro Ikusaba design profile[1]](https://static.wikia.nocookie.net/danganronpa/images/0/0e/Danganronpa_Zero_-_Design_Profile_-_Mukuro_Ikusaba.png/revision/latest/scale-to-width-down/150?cb=20200616224939)
![Danganronpa Zero - Design Profile - Isshiki Madarai.png (413 KB) Danganronpa Zero Isshiki Madarai design profile[1]](https://static.wikia.nocookie.net/danganronpa/images/5/54/Danganronpa_Zero_-_Design_Profile_-_Isshiki_Madarai.png/revision/latest/scale-to-width-down/150?cb=20200616224933)
![Danganronpa Zero - Design Profile - Jin Kirigiri.png (288 KB) Danganronpa Zero Jin Kirigiri design profile[1]](https://static.wikia.nocookie.net/danganronpa/images/2/23/Danganronpa_Zero_-_Design_Profile_-_Jin_Kirigiri.png/revision/latest/scale-to-width-down/150?cb=20200616224936)
![Danganronpa Zero - Design Profile - The Steering Committee.png (482 KB) Danganronpa Zero The Steering Committee design profile[1]](https://static.wikia.nocookie.net/danganronpa/images/4/48/Danganronpa_Zero_-_Design_Profile_-_The_Steering_Committee.png/revision/latest/scale-to-width-down/150?cb=20200616224843)
![Danganronpa 3 Booklet - Design Sketches - Steering Committee Member (1).png (3.39 MB) Danganronpa 3 Steering Committee Member early design sketches[2]](https://static.wikia.nocookie.net/danganronpa/images/c/c3/Danganronpa_3_Booklet_-_Design_Sketches_-_Steering_Committee_Member_%281%29.png/revision/latest/scale-to-width-down/150?cb=20181114185517)
![Danganronpa 3 Booklet - Design Sketches - Steering Committee Member (2).png (3.24 MB) Danganronpa 3 Steering Committee Member early design sketches[2]](https://static.wikia.nocookie.net/danganronpa/images/3/33/Danganronpa_3_Booklet_-_Design_Sketches_-_Steering_Committee_Member_%282%29.png/revision/latest/scale-to-width-down/150?cb=20181114185217)
![Danganronpa 3 Booklet - Design Sketches - Steering Committee Member (3).png (2.58 MB) Danganronpa 3 Steering Committee Member early design sketches[2]](https://static.wikia.nocookie.net/danganronpa/images/1/18/Danganronpa_3_Booklet_-_Design_Sketches_-_Steering_Committee_Member_%283%29.png/revision/latest/scale-to-width-down/150?cb=20181114185545)
![Danganronpa 3 Booklet - Design Sketches - Steering Committee Member (4).png (2.56 MB) Danganronpa 3 Steering Committee Member early design sketches[2]](https://static.wikia.nocookie.net/danganronpa/images/c/cd/Danganronpa_3_Booklet_-_Design_Sketches_-_Steering_Committee_Member_%284%29.png/revision/latest/scale-to-width-down/150?cb=20181114185554)













![Danganronpa 1.2 Reload Clear File Set (2).png (4.15 MB) Clearfile[3] (Comiket 84)](https://static.wikia.nocookie.net/danganronpa/images/8/8c/Danganronpa_1.2_Reload_Clear_File_Set_%282%29.png/revision/latest/scale-to-width-down/109?cb=20171001073519)


![Yasuke and Ryōko sketch by Danganronpa Gaiden Killer Killer manga artist Mitomo Sasako.jpg (149 KB) Pencil illustration fanart by Danganronpa Gaiden: Killer Killer artist Mitomo Sasako[4]](https://static.wikia.nocookie.net/danganronpa/images/b/b6/Yasuke_and_Ry%C5%8Dko_sketch_by_Danganronpa_Gaiden_Killer_Killer_manga_artist_Mitomo_Sasako.jpg/revision/latest/scale-to-width-down/120?cb=20161222001517)